Preparing for Parenthood: How to Clean Baby Bottles
Having a baby is a big life change. Babies sleep a lot, soil their diapers a lot, and eat a lot. In general, newborns eat every 2 to 3 hours, or 8 to 12 times per day. As they grow, the number of times they eat per day will decrease while the amount they eat each time will increase.
In a survey of new parents conducted for the American Cleaning Institute, 76% of parents listed kitchen cleaning and preparation for bottle cleaning/sterilization as the most important cleaning and hygiene priorities when preparing to welcome a new baby into the home.
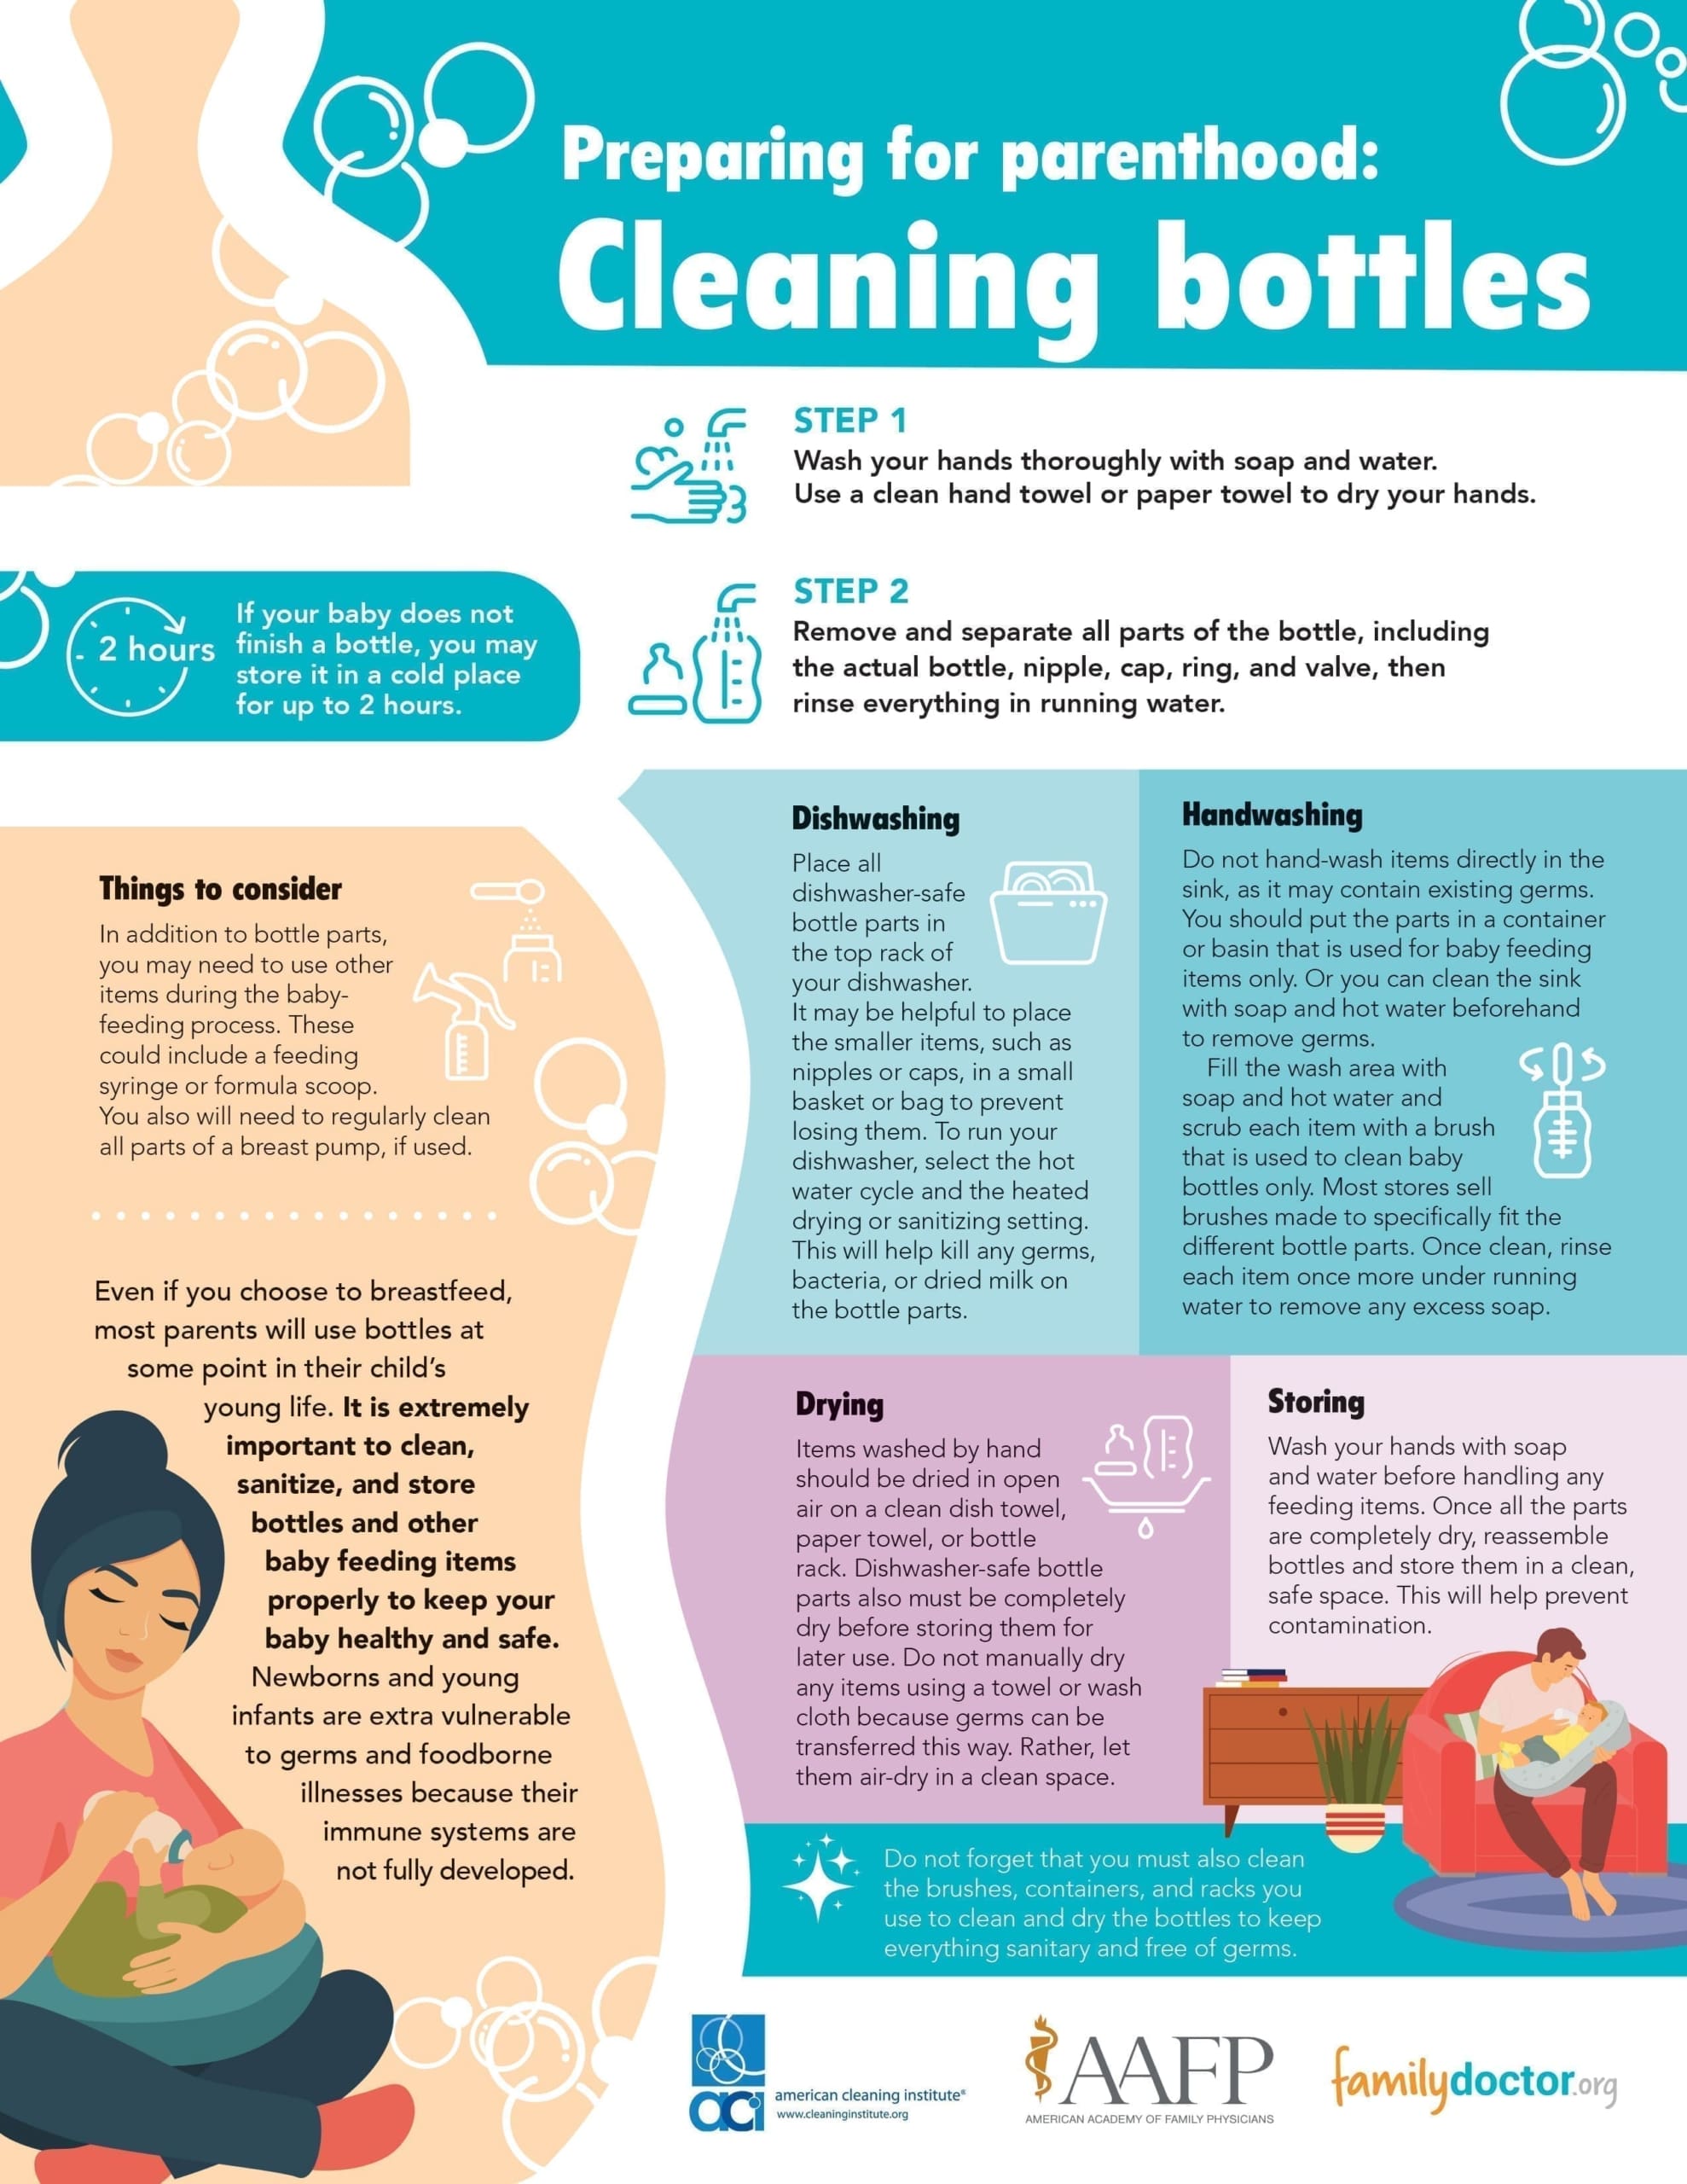
Even if you choose to breastfeed, most parents will use bottles at some point in their child’s young life. It is extremely important to clean, sanitize, and store bottles and other baby feeding items properly to keep your baby healthy and safe. Newborns and young infants are extra vulnerable to germs and foodborne illnesses because their immune systems are not fully developed.
Path to improved health
Baby bottles must be cleaned after each use or feeding. If your baby does not finish a bottle, you may store it in a cold place for up to 2 hours, but no longer. Never rinse and reuse or add new formula or breast milk to an unclean or already existing bottle. You must fully clean and dry bottles to prevent bacteria or germ growth.
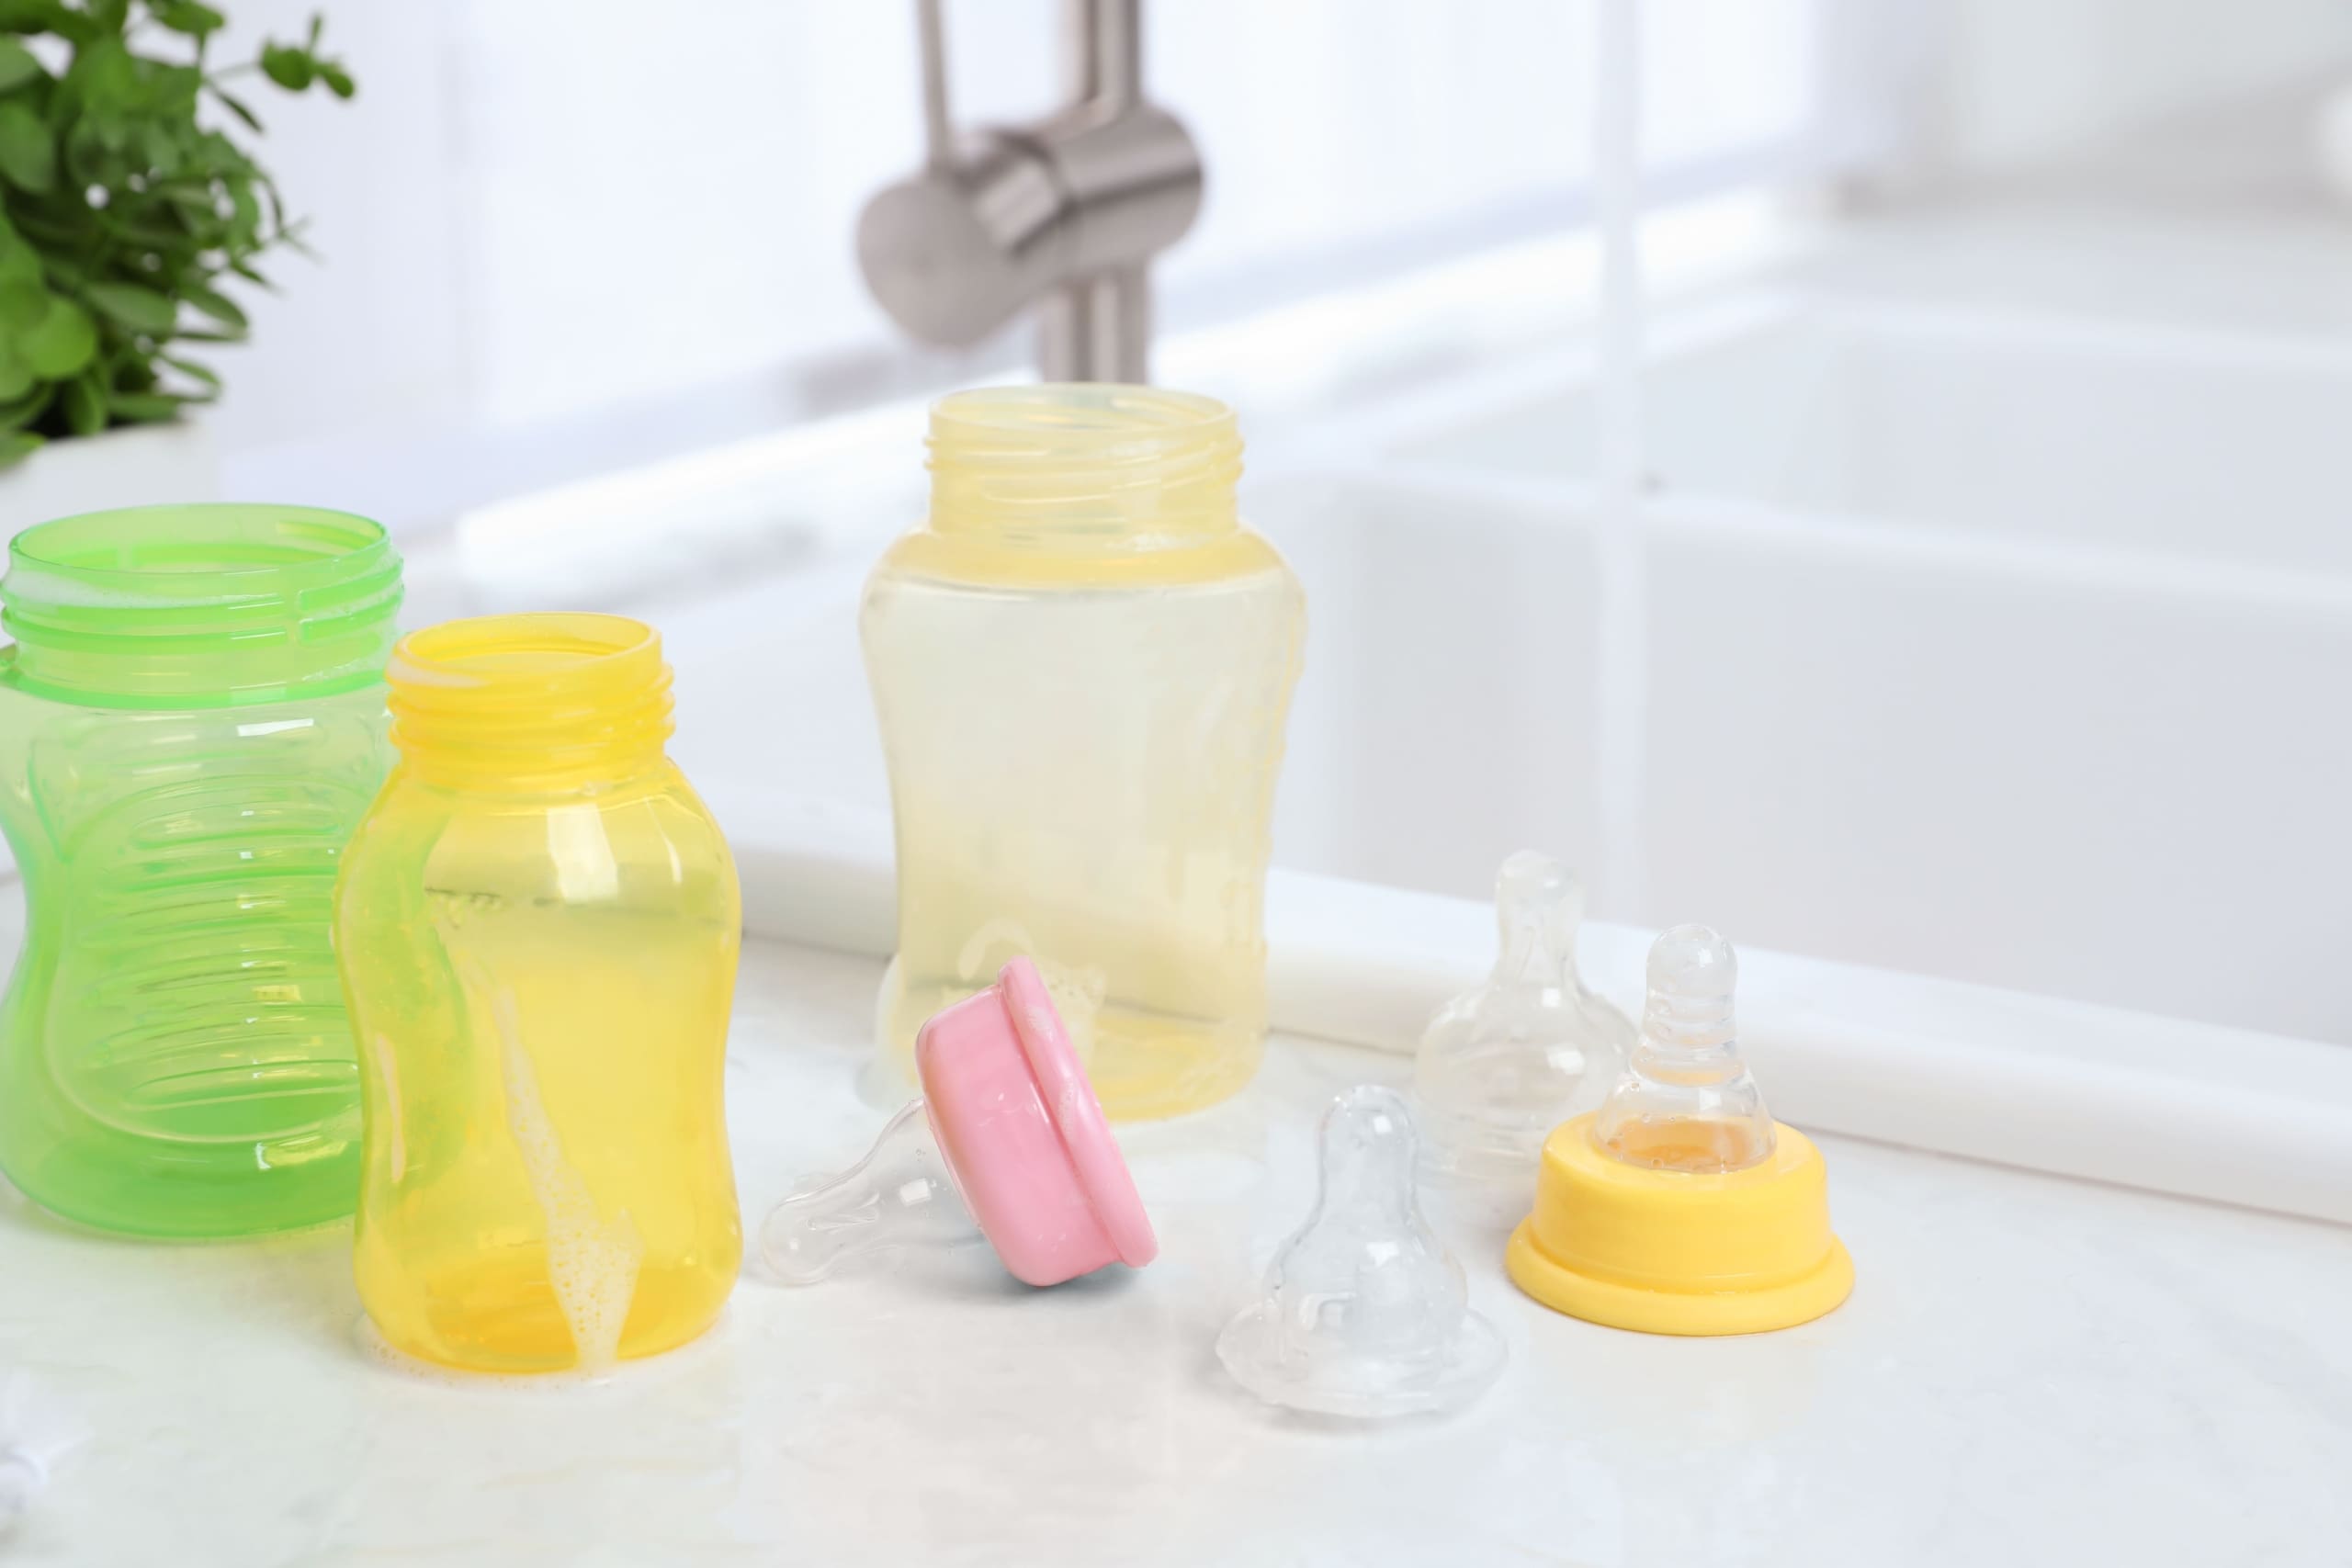
Each bottle contains multiple components, including the actual bottle, nipple, cap, ring, and valve. Some of these may be dishwasher-safe or you might have to wash parts by hand. Below are the recommended guidelines for properly caring for baby bottles.
Cleaning
Before you begin cleaning, drying, sanitizing, or storing your baby bottles, wash your hands thoroughly with soap and water. Use a clean hand towel or paper towel to dry your hands.
Remove and separate all parts of the bottle, then rinse everything in running water. Make sure you know which parts are hand wash only and which parts may be cleaned in the dishwasher.
Dishwasher-safe
Place all dishwasher-safe bottle parts in the top rack of your dishwasher. It may be helpful to place the smaller items, such as nipples or caps, in a small basket or bag to prevent losing them. To run your dishwasher, select the hot water cycle and the heated drying or sanitizing setting. This will help kill any germs, bacteria, or dried milk on the bottle parts.
Hand wash
Do not hand-wash items directly in the sink, as it may contain existing germs. You should put the parts in a container or basin that is used for baby feeding items only. Or you can clean the sink with soap and hot water beforehand to remove germs.
Fill the wash area with soap and hot water and scrub each item with a brush that is used to clean baby bottles only. Most stores sell brushes made to specifically fit the different bottle parts. Once clean, rinse each item once more under running water to remove any excess soap.
Drying
Items washed by hand should be dried in open air on a clean dish towel, paper towel, or bottle rack. Dishwasher-safe bottle parts also must be completely dry before storing them for later use. Do not manually dry any items using a towel or wash cloth because germs can be transferred this way. Rather, let them air-dry in a clean space.
Sanitizing
Sanitization is also an important part of the bottle cleaning process. The Centers for Disease Control and Prevention (CDC) recommends sanitizing all bottle parts at least once a day when your baby is less than 2 months old. Doctors may encourage doing this more often if your baby is premature or has a weakened immune system.
Some dishwashers have a sanitizing cycle that you can use. If not, there are several other methods you can choose from.
- Boil: Place individual bottle parts or feeding items in a large pot and cover them with water. Bring the water to a boil. After 5 minutes, turn the burner off and remove items with a clean utensil, such as tongs. Let all items air-dry in a clean space before next use.
- Steam: Place individual bottle parts or feeding items in a microwave or steaming device. Follow the appliance’s instructions to sanitize, cool, and dry the parts.
- Bleach: This method should only be used if all others are not available. In a clean container or basin, mix a solution of 2 teaspoons unscented bleach for each gallon (16 cups) of water. Place individual bottle parts or feeding items in the container. Ensure they are completed covered in the solution and let them soak for at least 2 minutes. Remove items with a clean utensil, such as tongs, and place them in a clean space to air-dry before next use.
Storing
Wash your hands with soap and water before handling any feeding items. Once all the parts are completely dry, reassemble bottles and store them in a clean, safe space. This will help prevent contamination.
Things to consider
In addition to bottle parts, you may need to use other items during the baby-feeding process. These could include a feeding syringe or formula scoop. You also will need to regularly clean all parts of a breast pump, if used. Essentially, anything that comes into contact with breast milk or prepared formula must be cleaned, dried, sanitized, and stored following the recommendations above. A scoop used to measure dry formula only needs to be cleaned if it gets dirty or contaminated.
Do not forget that you must also clean the brushes, containers, and racks you use to clean and dry the bottles. This keeps everything sanitary and free of germs.
Questions to ask your doctor
- Do I need to sanitize bottle or breast pump parts before using them for the first time?
- Is there a point when I need to throw away certain bottle parts and get new ones?
ADVERTISEMENT
ADVERTISEMENT
Related Articles


