Bringing a new baby home is one of the most exciting times in a parent’s life. It can also be overwhelming with the abundance of responsibilities and routines that come with taking care of this new addition.
How often should you change a baby’s diaper?
According to the American Academy of Pediatrics (AAP), a baby needs its diaper changed as many as 8 to 12 times a day in the beginning. This equates to about every 2 to 3 hours. Most disposable diaper brands include a line on the outside fabric of the diaper that will change color when the diaper becomes wet—usually indicating the baby has peed. A baby’s skin can become easily irritated if it stays in a soiled diaper for too long. It can also cause a rash or infection in the diaper area.
Path to improved safety
There are steps you can take to make the diaper-changing process easier and more efficient. They will also help to keep your baby safe, clean, healthy and happy.
Set up a location
Establish a convenient, central place to regularly change your baby’s diapers. Many parents choose to use traditional changing tables. You could also keep these items in multiple rooms that you frequently occupy or in one container that can move with you throughout the home.
Store all the items you need to complete the diaper change in your desired location, as well as supplies you’ll use to keep the area safe and clean. Ensure these items are easily accessible to you, but kept in a spot that your baby cannot reach them as he or she grows.
Items that you may need include:
- Changing pad
- Excess diapers and diaper wipes
- Diaper ointment
- Trash can
- Hand sanitizer
- Disinfectant
Prepare the space
Make sure your hands are clean prior to changing your baby’s diaper. Always lay your baby down in a place that is safe and secure. This may require using a buckle or strap to keep them in place, especially once they have learned to roll over. Never walk away from your baby or leave them unattended during the diaper changing process.
Perfect the technique
Lots of babies, particularly boys, tend to urinate once you open their diapers and expose their bare bottoms to fresh air. You might learn that keeping them covered as much as possible for as long as possible can help prevent wet accidents. There are also shields you can purchase to cover genitalia and contain pee.
Below is a suggested step-by-step routine you can follow when changing your baby’s diaper.
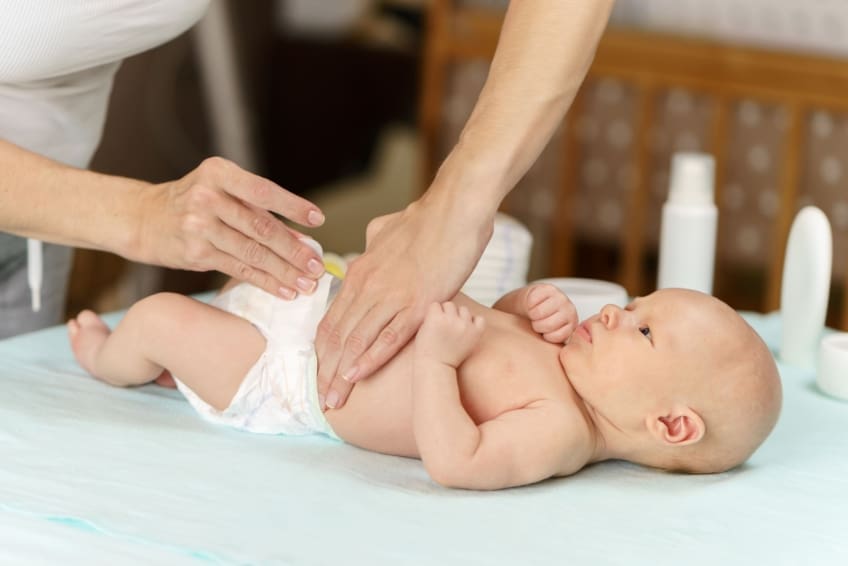
- Open a fresh diaper and place it under the existing diaper that your baby is wearing. If you are using disposable diapers, the tabs of the new diaper should be underneath the baby. Try to keep it clean and away from any soiled areas.
- Unfasten the tabs of the old diaper and use a pee shield, tissue, or towel, if needed. You may fold the old diaper underneath the baby’s bottom if it is not too messy. This can offer extra protection during the diaper change and keep the new diaper from getting dirty.
- Lift the baby’s feet and legs and wipe their privates from front to back. Do not reuse soiled wipes on any clean areas. Be sure you are wiping into folds or rolls of skin to properly clean the entire area.
- Apply desired diaper ointment as needed.
- Remove the old diaper and any soiled wipes or garments from under, on, or around the baby. Fold or bag them securely and set them far enough aside so that you or the baby don’t accidentally touch them. Again, do not leave the baby unattended.
- Complete the diaper change by centering the diaper on the baby’s bottom, positioning it under the baby’s belly bottom, and fastening the tabs to the top, or front, of the diaper. Pull the tabs tight enough to remove gaps, but not so tight that it squeezes your baby. Check the diaper to make sure it is secure in the leg and hip area.
Designate proper disposal
Some people choose to use trash receptacles made specifically for diapers. These can be helpful in containing germs and odor. If you need to walk away from the changing area to dispose of the diaper, take your baby with you or ensure they are in a safe and supervised space, such as their crib. Dispose of the diaper and any soiled materials in a clean and timely fashion.
Clean the area
It is important to always keep the diaper-changing area clean. This way, when you need to return to it again, it is germ-free and ready to be used. Remove any visible soil and use disinfectant spray or wipes to clean the surface. Once the area is sanitary, safely store all cleaning items. Check your stock of diaper changing items to make sure you are prepared for the next diaper change. Finish by washing your hands and the baby’s hands with soap and water.
Things to consider
As good as it is to be prepared at home, you will also need to change your baby’s diapers while you are on the go. Try to carry the same necessary changing items it a diaper bag when you are out running errands or traveling.
Ensure your hands are clean, either by washing them or using hand sanitizer, then place your baby in a clean, safe space. Change the baby’s diaper and dispose of all trash while keeping the baby secure. Wipe down the changing pad if you plan on reusing it later, and again wash or sanitize your hands and the baby’s hands.
As with any new routine, be ready for unexpected circumstances. Some extra messy diaper changes may warrant a trip to the sink or tub to clean up with water, soap, and a washcloth. Others may require replacing or disposing of your changing pad. It is also not uncommon for the baby to need a new outfit entirely, so keep an extra set of clothes nearby.
Questions to ask your doctor
- How many diapers will I need to buy for my newborn baby?
- How often should I change my baby’s diaper?
- Is diaper ointment used to prevent diaper rash or to treat it?
- What type of diaper ointment should I use?
Resources
American Cleaning Institute’s Clean First Steps Diaper Changing Resource
![]()
Copyright © American Academy of Family Physicians
Esta información proporciona una visión general y puede que no se aplique a todos. Hable con su médico de familia para averiguar si esta información se aplica a usted y para obtener más información sobre este tema.


